
Projects
Create, switch between, and archive projects, manage project members, and use the Project Dashboard.
About projects
Projects represent a distinct scope of work — a product, initiative, system, or agent — that your team wants to bring into compliance.
A single project can have multiple policies applied to it, each tailored to a unique compliance objective.
Key actions associated with projects include:
- Creating a project
- Using the Project Dashboard
- Switching between projects
- Accessing project settings
- Archiving a project
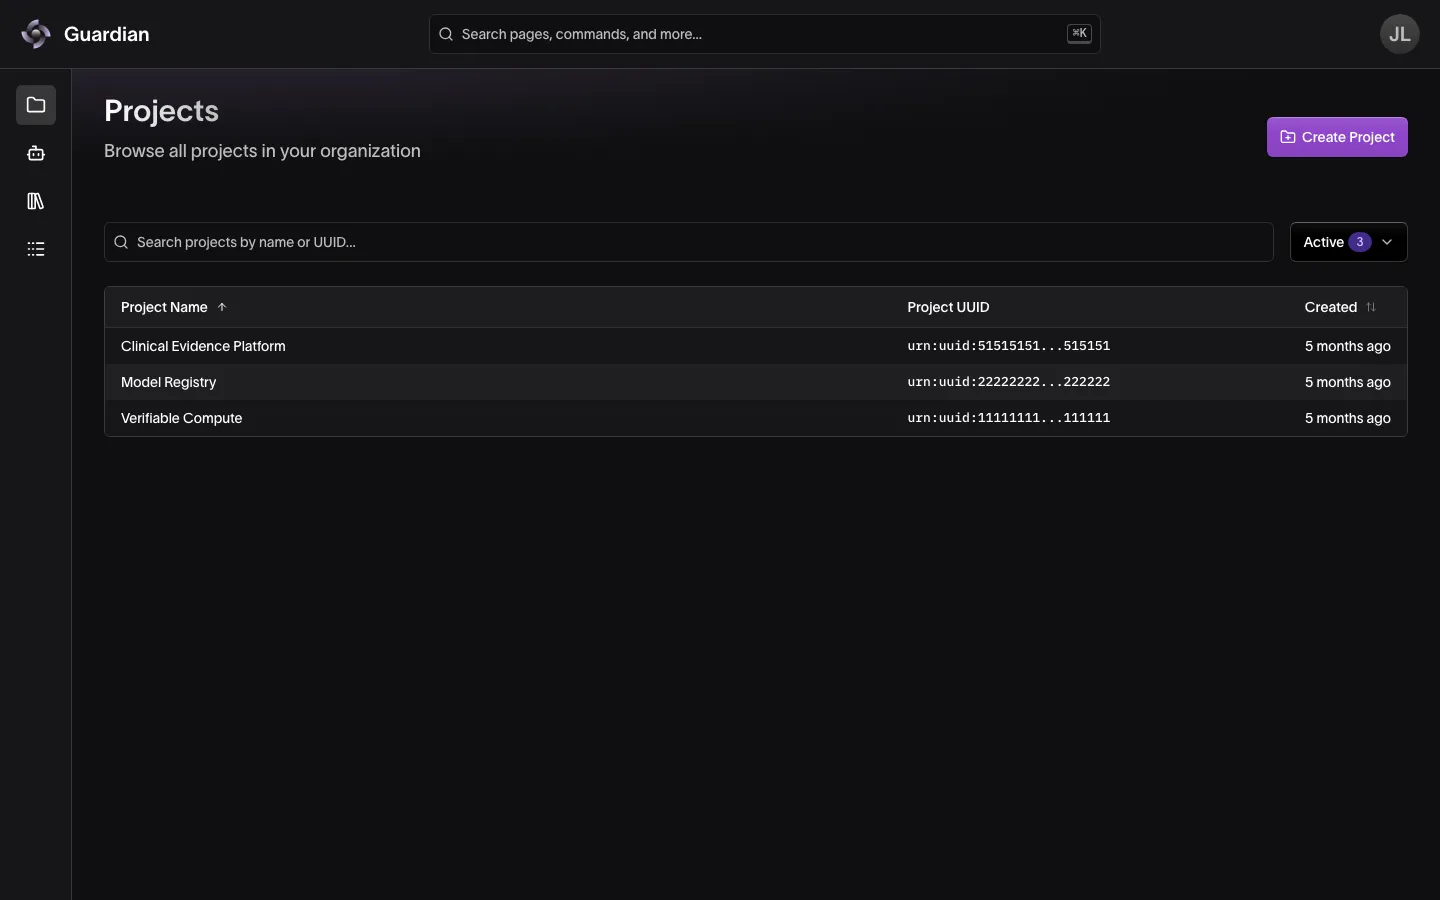
Creating a project
Creating a project is one of the first actions you take in Guardian. By creating a project, you define your scope of work and establish a workspace to add team members and apply policies.
Note: project names and descriptions cannot be edited after creation.
Only Organization Owners can create and archive projects.
To create a project from the Projects page:
- Navigate to Projects in the sidebar
- Select Create Project
- Enter a Project Name and Project Description
- Select Create Project
To create a project from within a project:
- Select the current project name at the top of the project sidebar
- Select Create Project at the bottom of the list
- Enter a Project Name and Project Description
- Select Create Project
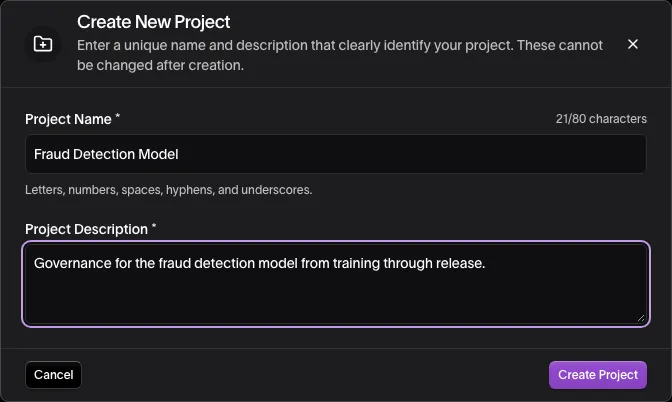
Project names can be up to 80 characters of letters, numbers, spaces, hyphens, and underscores, and must be unique in your organization, including archived projects.
Using the Project Dashboard
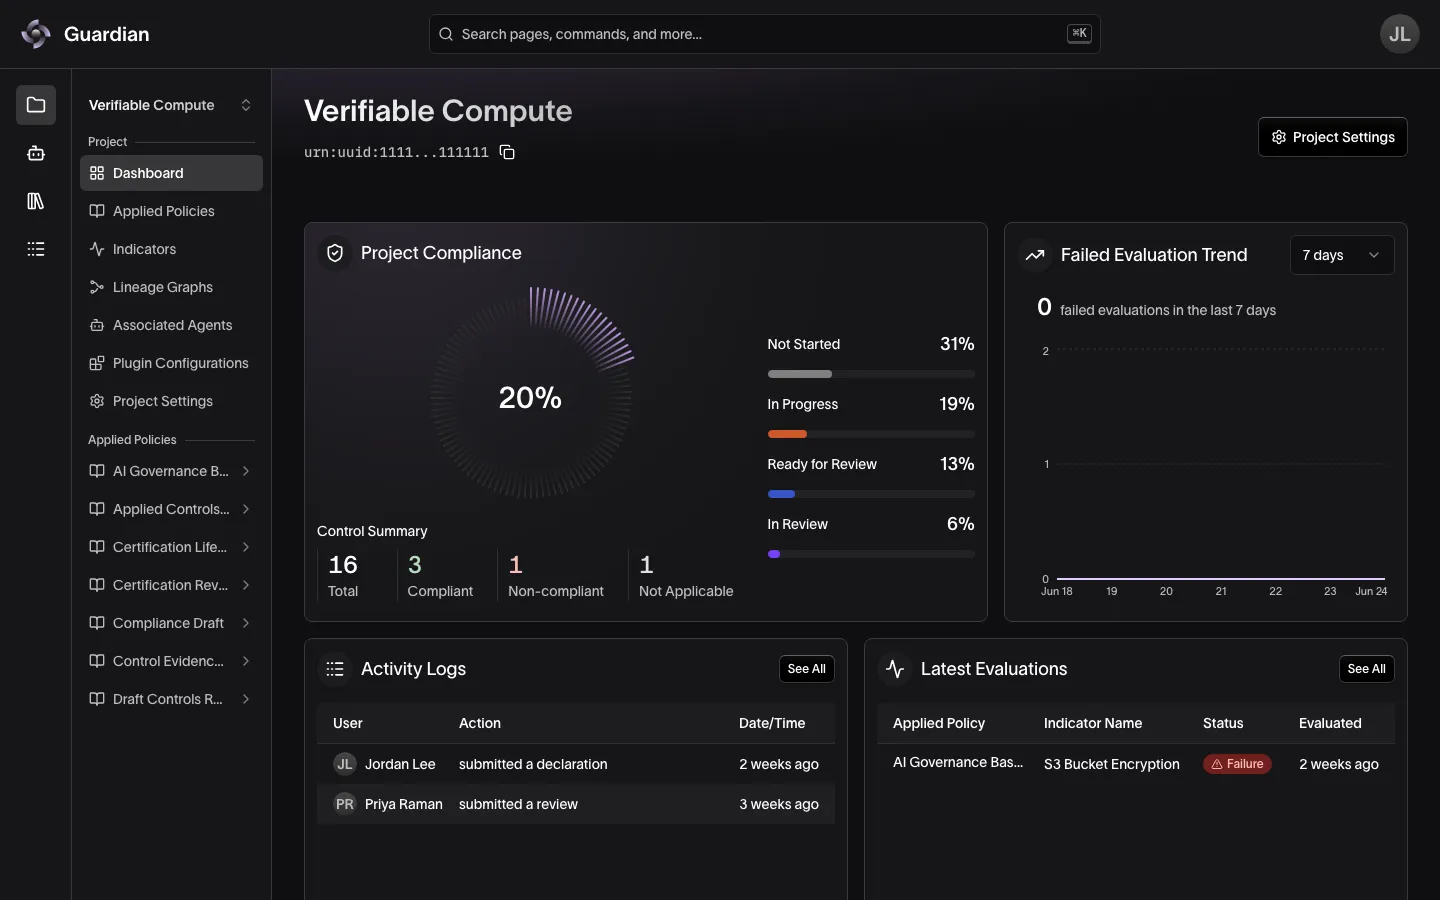
Once you’ve created a project, you can access its Project Dashboard to view helpful information and take key actions. The Dashboard is headed by the project’s name, with the project’s UUID under it; select the copy button beside the UUID to copy it for the SDK or the API.
A project’s sidebar links to its pages:
- Dashboard: See helpful information across controls, indicators, and general activity
- Applied Policies: See what policies have been applied
- Indicators: See indicators that have been created for the project
- Lineage Graphs: See what lineage graphs have been associated with the project
- Project Settings: Manage project members and archive the project, if you have the Edit Project Settings permission
Below these, the Applied Policies section lists each policy applied to the project. Select one to open its own sidebar, headed by the policy’s name: Overview, Controls, Monitoring, Evaluation Logs, and Certification. An indicator, selected from Indicators, opens a sidebar of its own too: Configuration, Monitored Controls, and Evaluation Logs.
Deployments that run the Agent Gateway have two more:
- Associated Agents: See the agents linked to the project, their traffic, and their membership state
- Plugin Configurations: See the gateway plugins in effect for the project and their activation history
Switching between projects
If you establish multiple projects, you can select or switch between projects in Guardian in several ways.
To select a project or switch to a new project from the Projects page:
- Navigate to Projects in the sidebar
- Select a project from the Projects table
To switch to another project from within a project:
- Select the current project name at the top of the project sidebar
- Select a project from the list; you can type to search
On an indicator’s page, the top of the sidebar switches indicators instead. Select ‹ Indicators first to return to the project sidebar.
Accessing project settings
Project settings are a space for:
- Viewing existing project members and their roles
- Adding or removing project members
- Archiving a project
To open project settings, select Project Settings in the project sidebar or in the top right corner of the project’s Dashboard. Both appear only with the Edit Project Settings permission.
Archiving a project
Archiving a project prevents any further activity from being recorded in that project — users will not be able to take any actions. This can be used when a project no longer requires compliance tracking.
Before archiving a project, all applied policies within the project must first be archived. Once archived, the project’s contents are inaccessible until it is reapplied; only high-level project details remain accessible in the archived state.
Reapplying a project returns it to its original, active state.
To archive a project:
- Ensure all applied policies within the project are archived (see Archiving Applied Policies)
- In the project sidebar, select Project Settings
- Select Archive Project
- Type the project name to confirm
- Select Archive
To reapply a project:
- Navigate to Projects in the sidebar
- Select the Status filter dropdown and choose Archived
- Select the archived project
- Select Reapply Project
- Type the project name to confirm
- Select Reapply
Related
- Policies — apply, archive, and reapply the policies in a project
- Member Management — add project members and change their roles
- Indicators — create the indicators on the project’s Indicators page
- Lineage Graphs — view the graphs on the project’s Lineage Graphs page
- Associated Agents — link registered gateway agents to the project
- Integrity Actions — why a project’s name and description are permanent